PLC: Post Label Center
Extension for Magento 2
User Guide
CopeX GmbH
Web: https://copex.io
Email: office@copex.io
Table of Contents
| Section | Page |
|---|---|
| 1 Requirements | 3 |
| 2 Configuration | 3 |
| 2.1 General Settings | 3 |
| 2.2 Shipment Settings | 5 |
| 2.3 Return Labels | 6 |
| 2.4 Sales Settings | 7 |
| 2.5 Scheduled Shipping | 7 |
| 2.6 Default Shipping Method per Country | 8 |
| 2.7 Shipping Methods & Prices | 9 |
| 2.8 Customs Settings | 10 |
| 3 Creating Labels | 12 |
| 3.1 Single Label in the Order View | 12 |
| 3.2 Mass Action: Create Multiple Labels | 13 |
| 3.3 Scheduled Labels | 14 |
| 4 Admin Menu & Overviews | 15 |
| 4.1 Label Overview | 15 |
| 4.2 Order Grid with PLC Column | 15 |
| 4.3 Scheduled Labels | 16 |
| 5 Return Labels | 17 |
| 5.1 Creating a Return in the Backend | 17 |
| 5.2 QR-Code Return Labels | 17 |
| 5.3 Customer Returns in the Frontend | 17 |
| 6 Additional Services | 18 |
| 7 End of Day | 18 |
| 8 Import Shipments | 19 |
| 9 Customs Declarations | 20 |
| 10 PostPay Refund | 21 |
| 11 Error Handling | 22 |
1 Requirements
- Magento 2.4.7 or higher (compatible with 2.4.8)
- PHP 8.1 or higher
- Austrian Post PLC service credentials (Client ID, Organisation Unit ID, Organisation Unit GUID)
- Request credentials from Austrian Post customer service or by email to plc@post.at
- For PostPay Refund: additionally a PostPay API Key and API Secret
2 Configuration
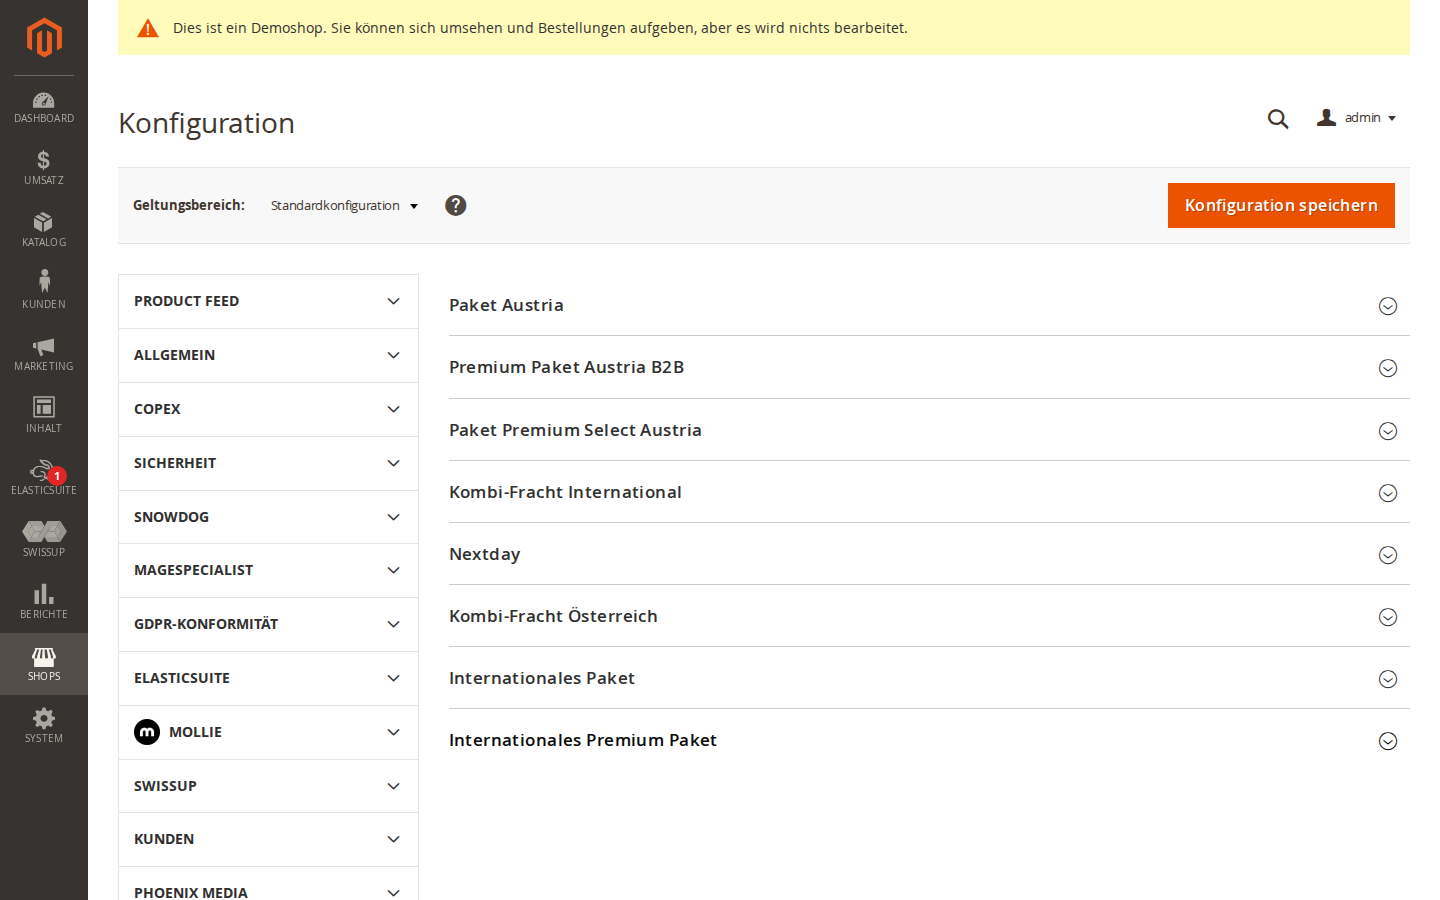
The module configuration is located in the Magento 2 admin under Stores > Configuration > Post Label Center (PLC). The module has its own section in the left navigation with the Austrian Post logo.
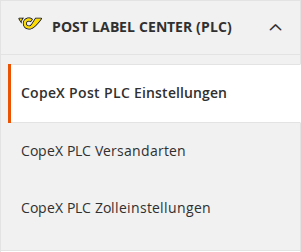
Settings are divided into three areas:
- CopeX Post PLC Settings: General settings, shipping, returns, scheduled shipping
- CopeX PLC Shipping Methods: Shipping methods and price configuration
- CopeX PLC Customs / Zolleinstellungen: Customs declarations for international shipments
2.1 General Settings
Navigate to Post Label Center (PLC) > CopeX Post PLC Settings > General.
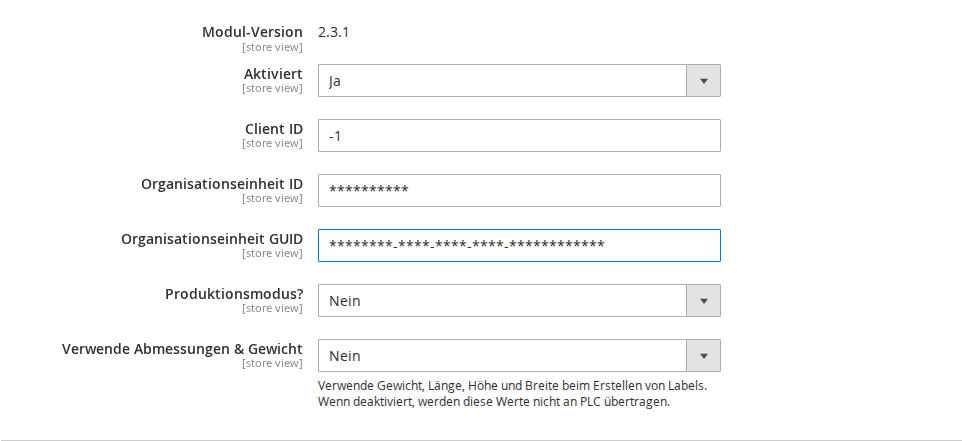
The following fields are required:
- Client ID: Your Austrian Post PLC client ID (your debtor number at Austrian Post).
- Organisation Unit ID: The organisation unit ID (also called department ID) provided by Austrian Post.
- Organisation Unit GUID: The globally unique identifier assigned to your organisation by Austrian Post.
- Production Mode?: Determines whether the PLC test server or the production system is used. Shipping labels are generated and can be downloaded in both modes.
Optional settings:
- Default Width, Default Height, Default Length: Define the standard parcel dimensions (in cm). These values are pre-filled in the order view and used for mass actions.
- Default Weight: Default weight in kg, used when weight cannot be calculated from the order.
- Use Dimensions & Weight: Toggles the weight, length, height, and width fields during label creation. When disabled, these values are not transmitted to PLC.
The following information is loaded automatically from your store configuration (Stores > Configuration > General > General > Store Information):
- Sender (company name)
- Street
- City
- Postcode
- VAT ID
2.2 Shipment Settings
Navigate to Post Label Center (PLC) > CopeX Post PLC Settings > Shipment.
- Create Shipment automatically: Creates a Magento shipment with a tracking number whenever a PLC label is generated.
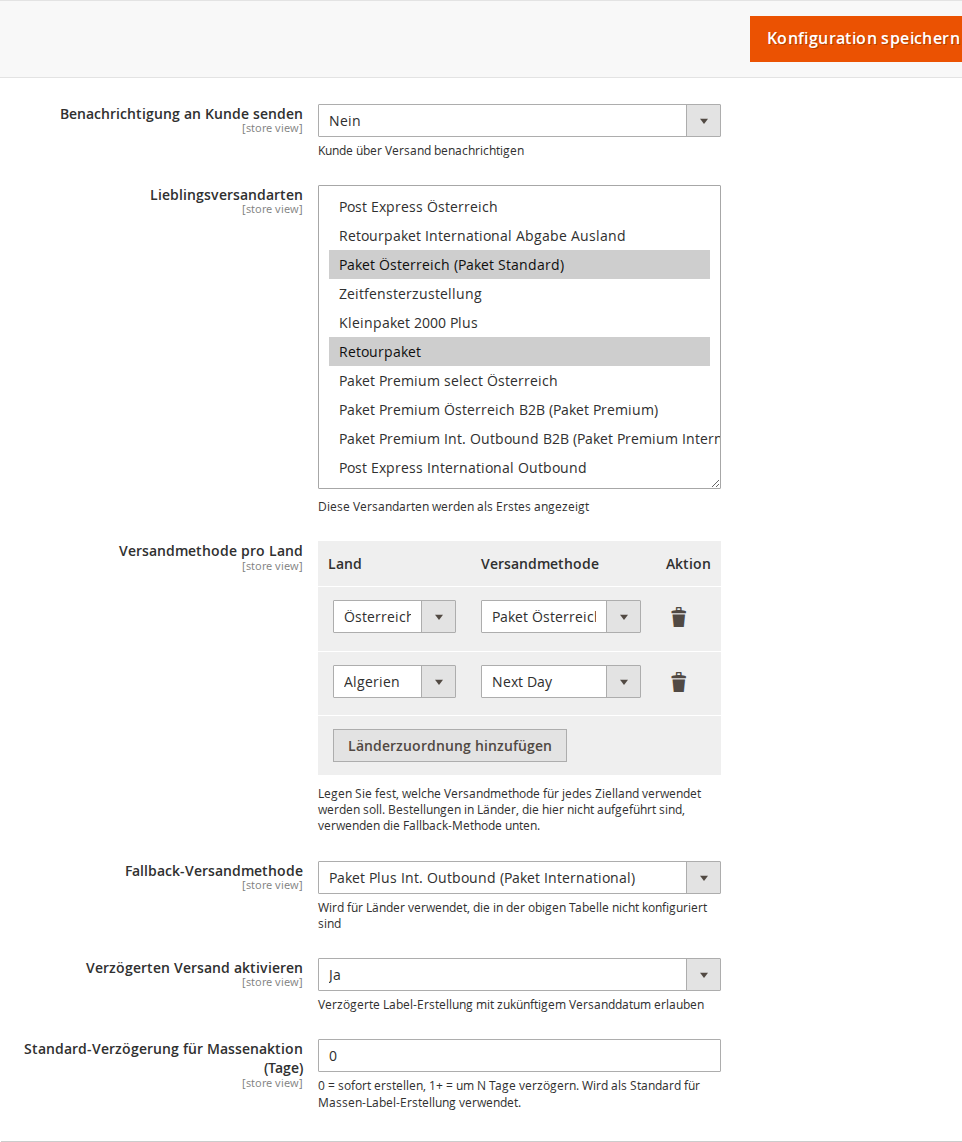
- Send notification to customer: Sends a shipping notification email to the customer (Austrian Post also sends its own tracking notification). Note that the tracking email template may need to be customised.
- Create label automatically if order was shipped with other carrier: When enabled, a PLC label is created automatically when a shipment is created for another carrier (e.g. flat rate, matrix rates).
2.3 Return Labels
Navigate to Post Label Center (PLC) > CopeX Post PLC Settings > Return Label.

- Enable Returns: Activates the option to create a return label for each PLC label in the backend.
- Enable Customer Returns: Customers can create and download a return label from the frontend (My Account > Orders).
- Maximum age of order: How many days after the order date the customer may create a return label. Use a numeric value, e.g.
30for 30 days,-1for unlimited. - Allow returns without prior label: Allows creation of a return label even without a prior shipping label.
- Don't allow returns for international packages: Blocks return label creation for international addresses.
2.4 Sales Settings
Navigate to Post Label Center (PLC) > CopeX Post PLC Settings > Sales.
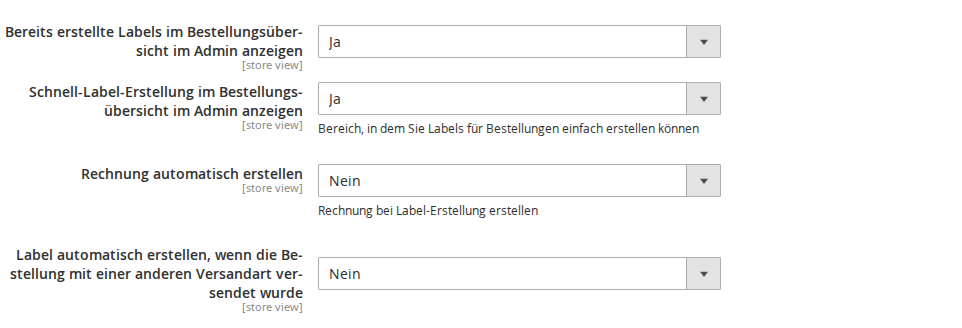
- Show already created labels in admin order view: Displays created PLC labels in the order detail view.
- Display Quick Create Labels in Admin Order View: Shows the quick-create form in the order view.
- Create Invoice automatically: Three options:
- No: No automatic invoice (default)
- Yes: Create an invoice automatically
- Show Checkbox: Choose individually at each label creation
2.5 Scheduled Shipping
Navigate to Post Label Center (PLC) > CopeX Post PLC Settings > Shipment.
With scheduled shipping, labels can be created for a future shipping date. Instead of being sent to PLC immediately, they are queued and processed automatically on the scheduled date.
- Enable Scheduled Shipping: Shows a date field in the label creation form in the order view.
- Default Delay for Mass Action (Days): Sets the delay for bulk label creation.
0= immediately,1= tomorrow,7= in one week.
How it works:
- Single label: When scheduled shipping is enabled, a "Shipping Date" field appears in the creation form. Choosing a future date queues the label instead of creating it immediately.
- Mass action: The configured default delay is automatically applied to all selected orders.
- Automatic processing: A daily cron job (
copex_plc_process_scheduled_labels, 06:00) processes all scheduled labels whose date has been reached. - Cancellation: Scheduled labels with "Pending" status can be cancelled in the admin overview.
2.6 Default Shipping Method per Country
Navigate to Post Label Center (PLC) > CopeX PLC Shipping Methods.
At the top of this section you find the country-specific shipping method assignment:
- Shipping Method per Country: A table where you can assign a specific shipping method to each destination country. When creating a label (single or in bulk), the configured method is pre-selected automatically based on the shipping country of the order.
- Fallback Shipping Method: Used for countries not listed in the table (default: Internationales Paket).
In the order view, the configured shipping method is pre-selected automatically in the shipping method dropdown. For bulk mass actions, the country mapping is applied individually to each order.
2.7 Shipping Methods & Prices
Navigate to Post Label Center (PLC) > CopeX PLC Shipping Methods.
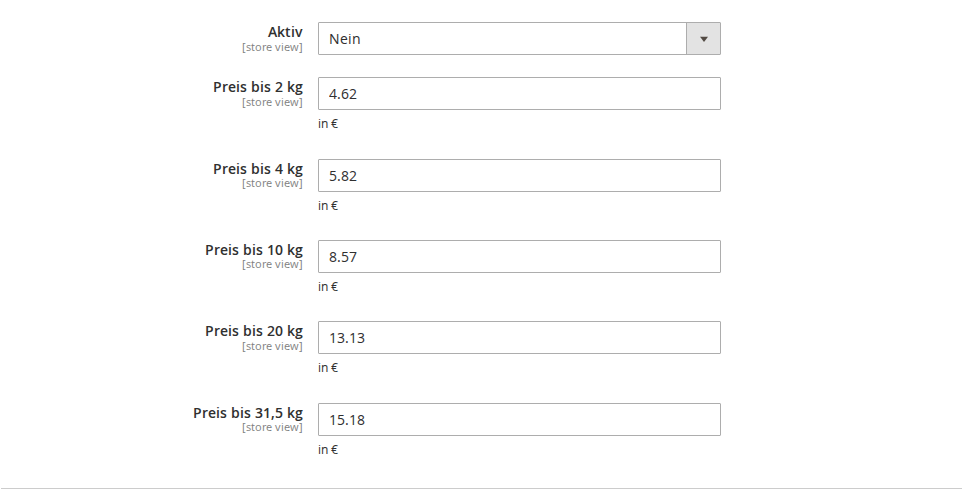
Below the country configuration, you find the price configuration for each shipping method. For each method you can set:
- Active: Enable or disable the shipping method
- Price till x kg: Shipping cost for the respective weight tier
The following shipping methods are available:
| Shipping Method | Service ID |
|---|---|
| Paket Austria | 10 |
| Premium Paket Austria B2B | 56 |
| Paket Premium Select Austria | 57 |
| Premium Light | 58 |
| Nextday | 54 |
| Combi-freight Austria | 55 |
| Combi-freight International | 63 |
| Internationales Paket | 70 |
| Internationales Premium Paket | 71 |
| Post Express Austria | 1 |
| Paket light (with tracking) | 59 |
| Paket Medium (with tracking) | 60 |
Depending on which shipping methods and contracts you have with Austrian Post, you can activate or deactivate the corresponding methods.
2.8 Customs Settings
Navigate to Post Label Center (PLC) > CopeX PLC Customs / Zolleinstellungen.
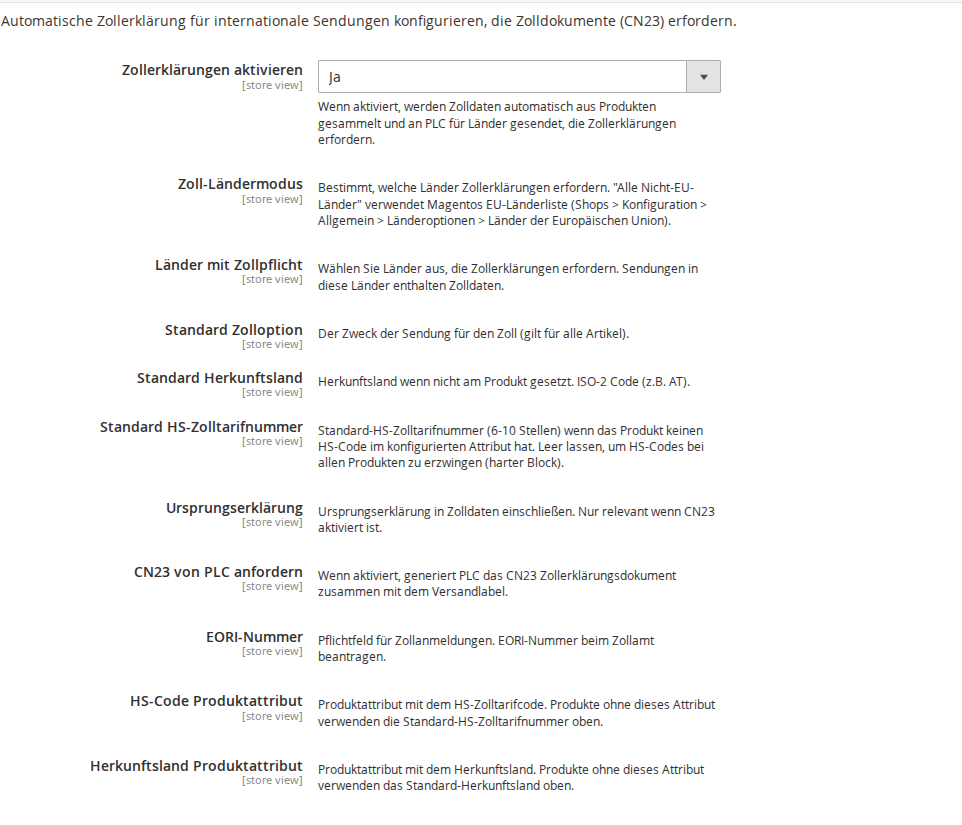
The customs settings enable automatic collection of customs data for international shipments that require CN23 customs documents.
- Enable Customs Declarations: Master switch for automatic customs data collection.
- Customs Country Mode: Determines which countries require customs declarations:
- All non-EU countries (recommended): Uses Magento's built-in EU country list (configurable under General > Country Options > European Union Countries). Any country outside the EU automatically requires customs data. No manual maintenance needed.
- Custom country list: Manually select the countries requiring customs declarations via a multiselect field.
- Default Customs Option: Purpose of the shipment, Gift / Sample / Sale / Return / Document / Other (default: Sale).
- Default Country of Origin: Fallback when a product has no country of origin (default: AT).
- Default HS Tariff Code: Fallback HS code (6-10 digits). If left empty, label creation is blocked whenever a product has no HS code.
- Declaration of Origin: Include a declaration of origin with customs data (only visible when CN23 is enabled).
- Request CN23 from PLC: PLC generates the CN23 customs declaration document together with the shipping label.
- EORI Number: Your EORI number for customs declarations. Required for all customs declarations.
- HS Code Product Attribute: Which product attribute contains the HS tariff code. Default:
hs_tariff_code(created automatically during installation). - Country of Origin Product Attribute: Which product attribute contains the country of origin. Default:
country_of_manufacture.
Fallback chain: Product attribute > Default value > Hard block (error message listing affected SKUs).
3 Creating Labels
3.1 Single Label in the Order View
In the order detail view, find the Post.at PLC section. Click Create Post Label to open the form.
- Weight is filled in automatically from the order (if product weight data is available).
- Length, Height, and Width are pre-filled with the default values from the configuration (if configured). If "Use Dimensions & Weight" is disabled, these fields are not shown.
- The Shipping Method is pre-selected automatically based on the destination country (if a country mapping is configured).
- Shipping Date (optional, only when scheduled shipping is enabled): Choose a future date to create the label at a later time.
- Additional Services (optional): Select extra services such as COD, fragile, insurance, and more.
- Click Create Post Label. The label downloads immediately as a PDF and appears in the list.
After creation, the label is shown in the order view with the following options:
- Download Label: Download the label PDF again
- Cancel Post Label: Cancel the label (if permitted)
- Create return label: Create a return label from the shipping label
Each order can have multiple labels. All labels are listed one below the other.
3.2 Mass Action: Create Multiple Labels
In the order grid (Sales > Orders), select multiple orders and create labels via the Actions dropdown.
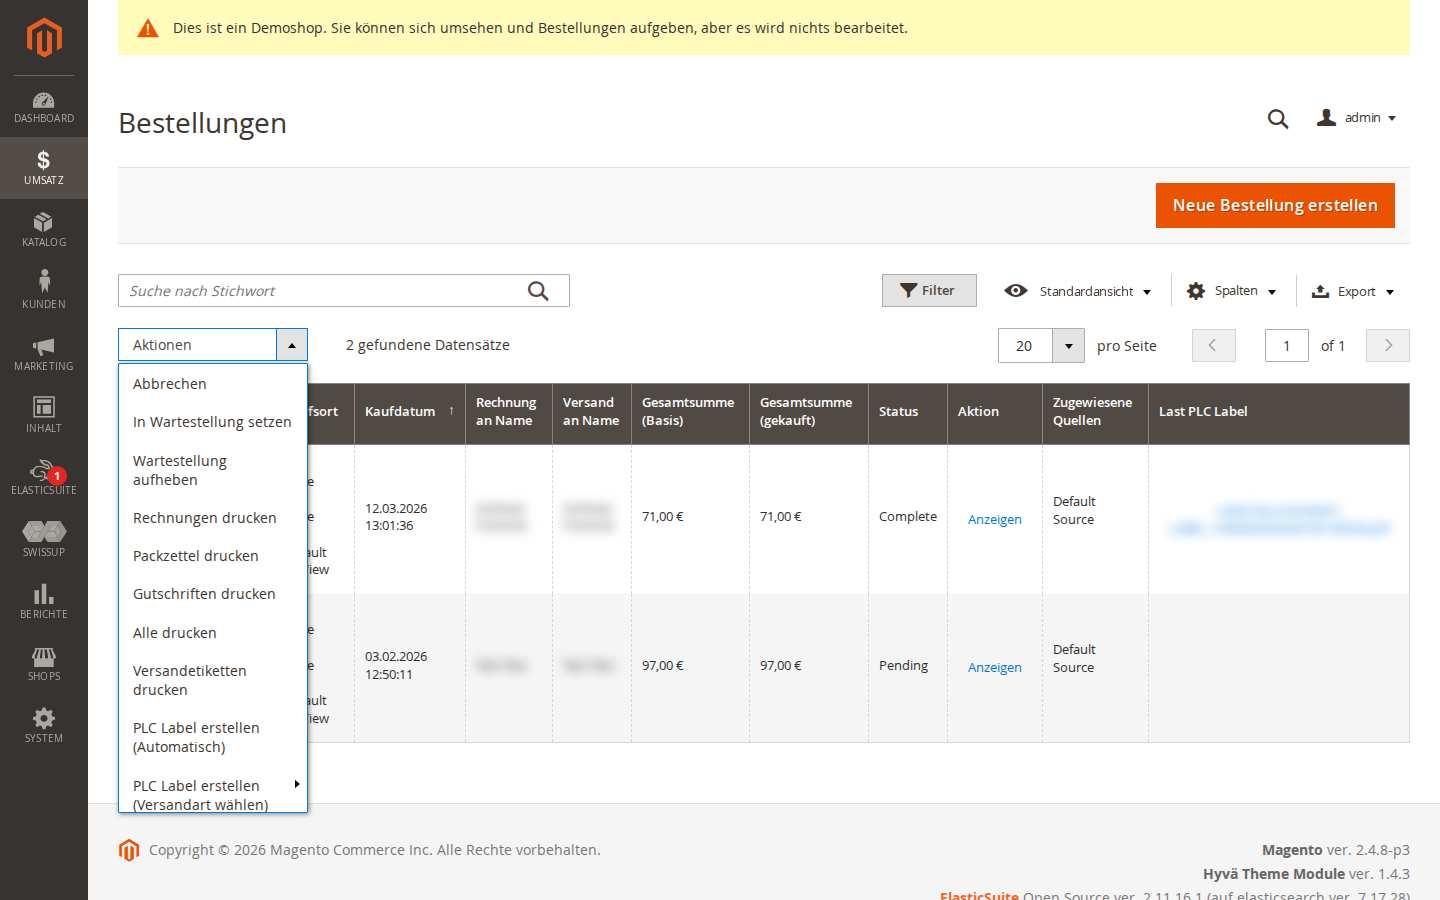
Two options are available:
-
Create PLC Label (Automatic): Creates labels using the configured default shipping method per country. The correct method for each order is determined automatically based on the destination country. Ideal for daily dispatch.
-
Create PLC Label (Select Method): Opens a dialog to select a specific shipping method. All selected orders receive labels with that shipping method.
Note: For mass actions, default values for Width, Height, and Length must be configured (or "Use Dimensions & Weight" must be disabled).
3.3 Scheduled Labels
When scheduled shipping is enabled:
- Single label: A date field appears in the creation form. Choosing a future date queues the label instead of creating it immediately.
- Mass action: The configured default delay (in days) is applied automatically. A delay of
0creates labels immediately.
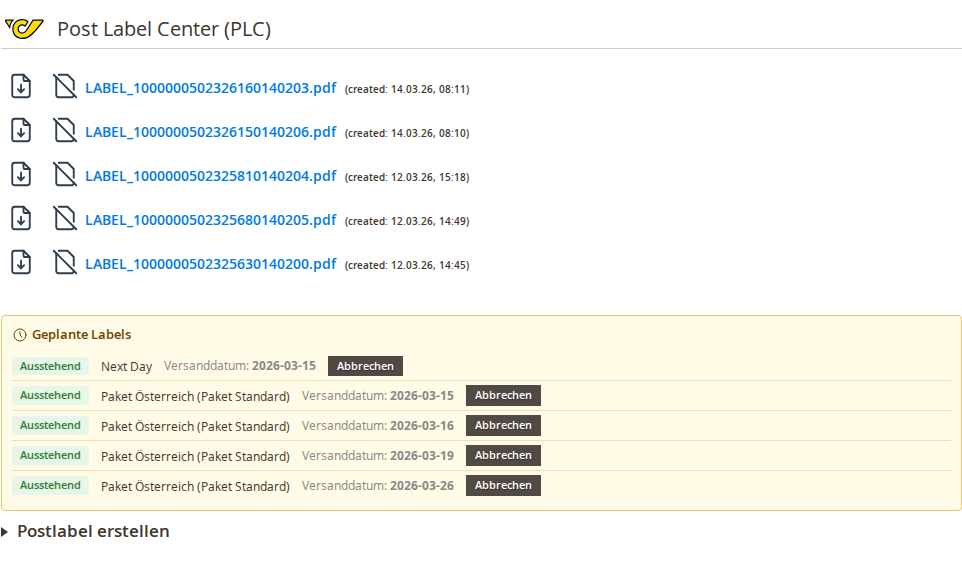
Scheduled labels are displayed in the order view with status and scheduled date. Pending labels can also be cancelled there.
Automatic processing runs daily at 06:00 via a cron job.
4 Admin Menu & Overviews
The PLC module adds a CopeX PLC section under Sales in the admin sidebar with the following menu items:
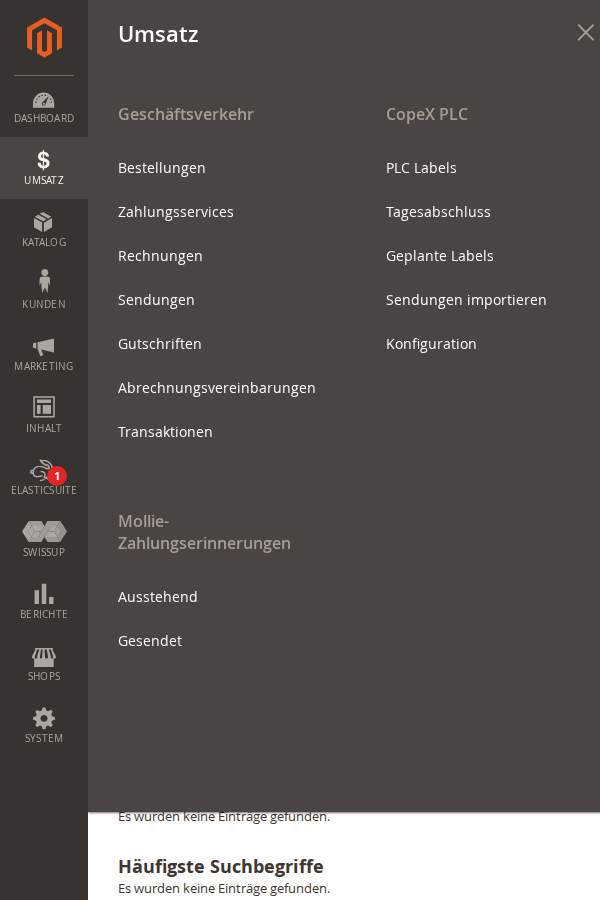
| Menu Item | Description |
|---|---|
| PLC Labels | Overview of all created shipping labels with download and cancellation options |
| End of Day | End-of-Day function. Informs Austrian Post that shipments are ready for pickup |
| Scheduled Labels | Overview of all scheduled labels with status, shipping date, and cancellation option |
| Import PLC Shipments | CSV import and manual import of existing PLC shipments |
| Configuration | Direct link to PLC settings (Stores > Configuration > Post Label Center) |
4.1 Label Overview
Under Sales > CopeX PLC > PLC Labels you find an overview of all created labels:
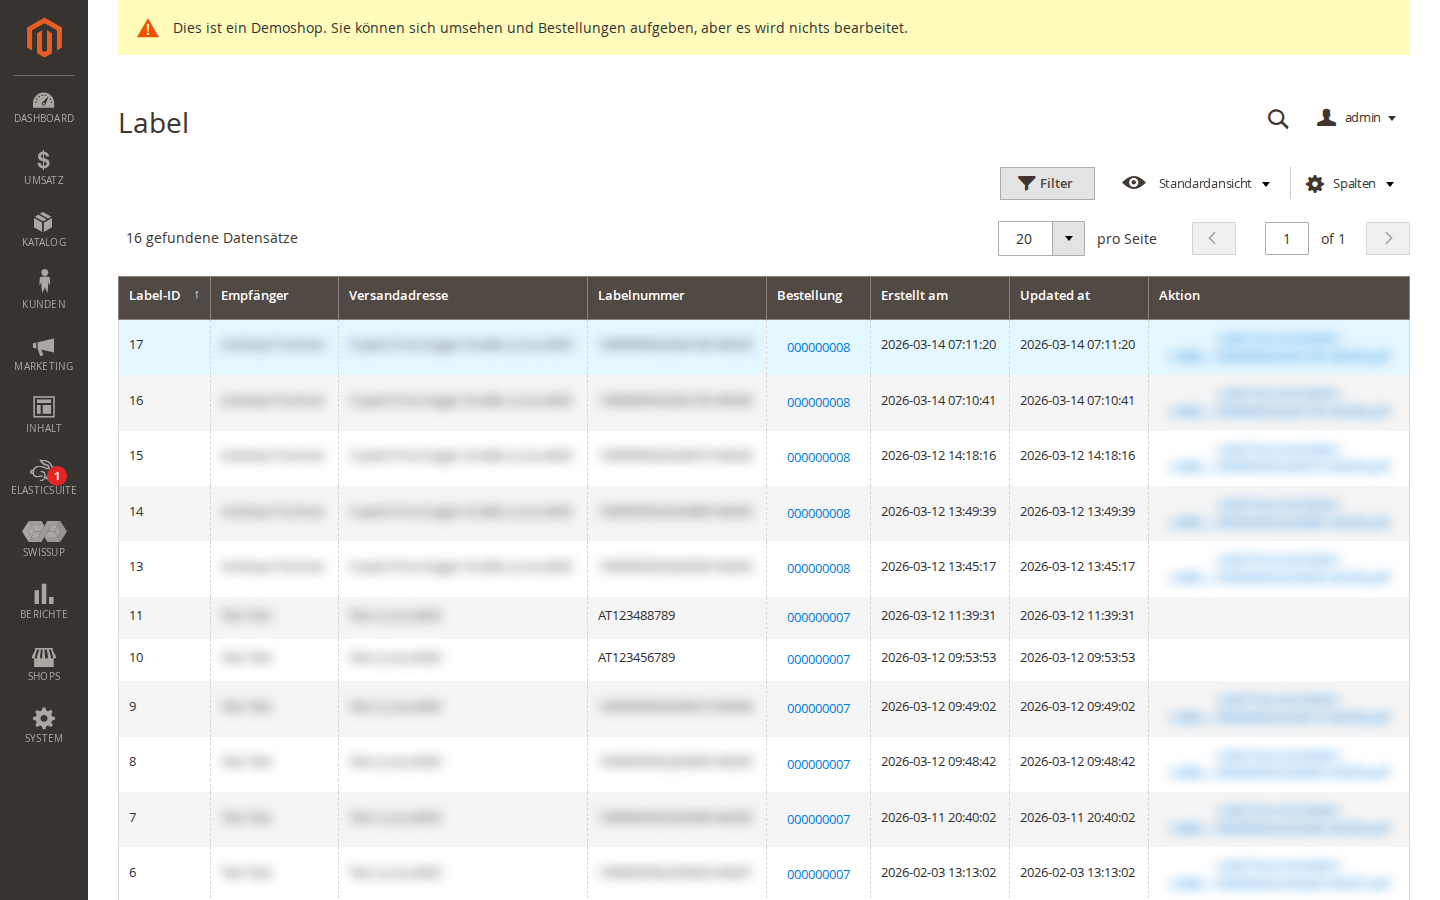
- Label ID, shipping method, shipping address
- Post label number (tracking number)
- Associated order number
- Creation and update date
- Actions: download label, create return label
4.2 Order Grid with PLC Column
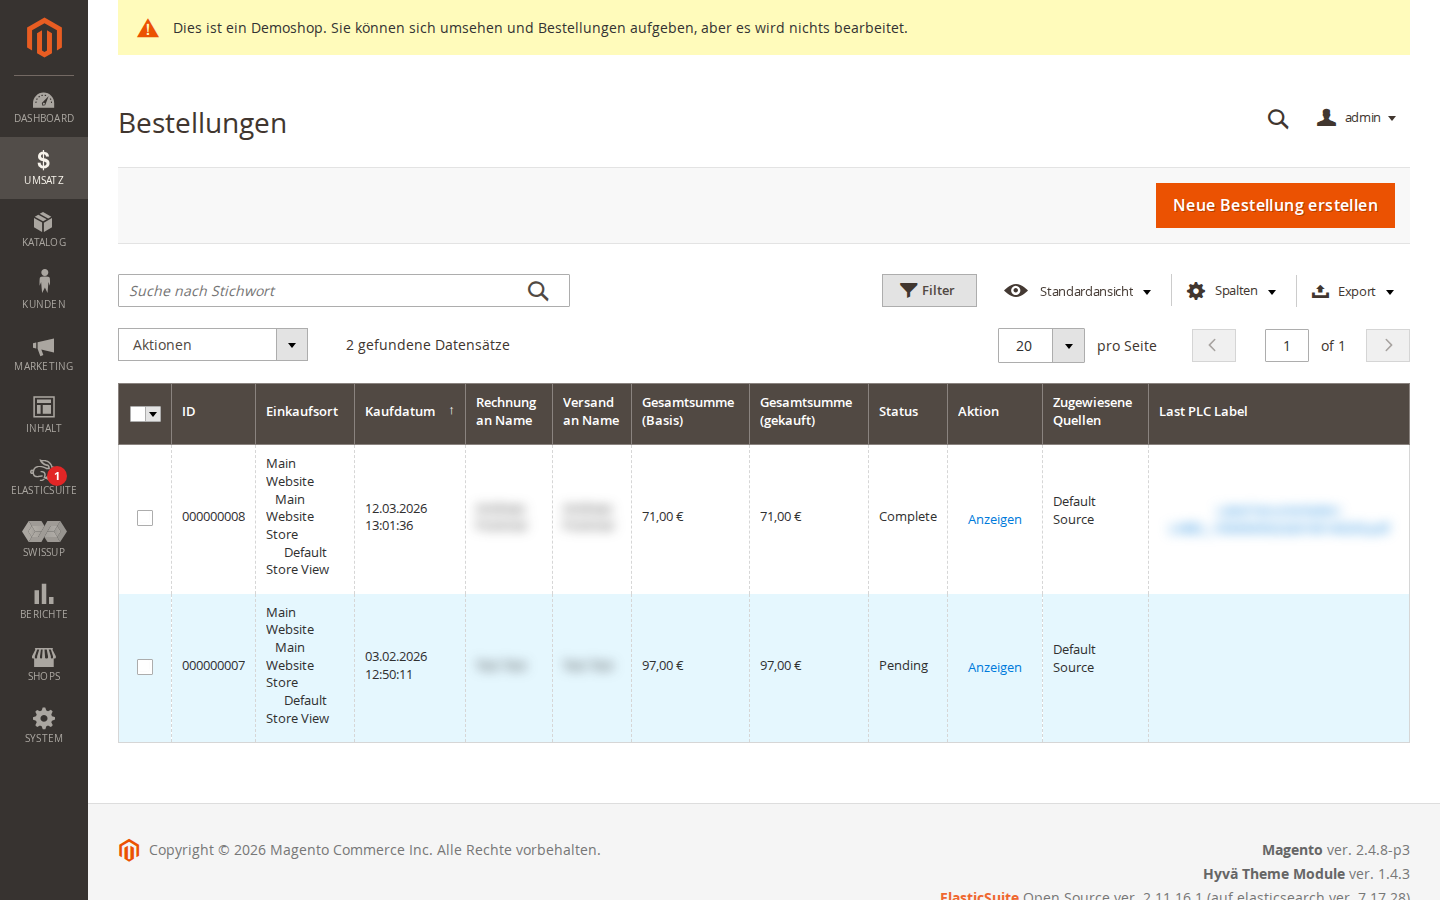
In the Magento order grid (Sales > Orders), the PLC Label column can be shown. This column indicates whether a Post label already exists and allows direct download. If the column is not visible, enable it via the Columns button.
4.3 Scheduled Labels
Under Sales > CopeX PLC > Scheduled Labels you find an overview of all scheduled labels:
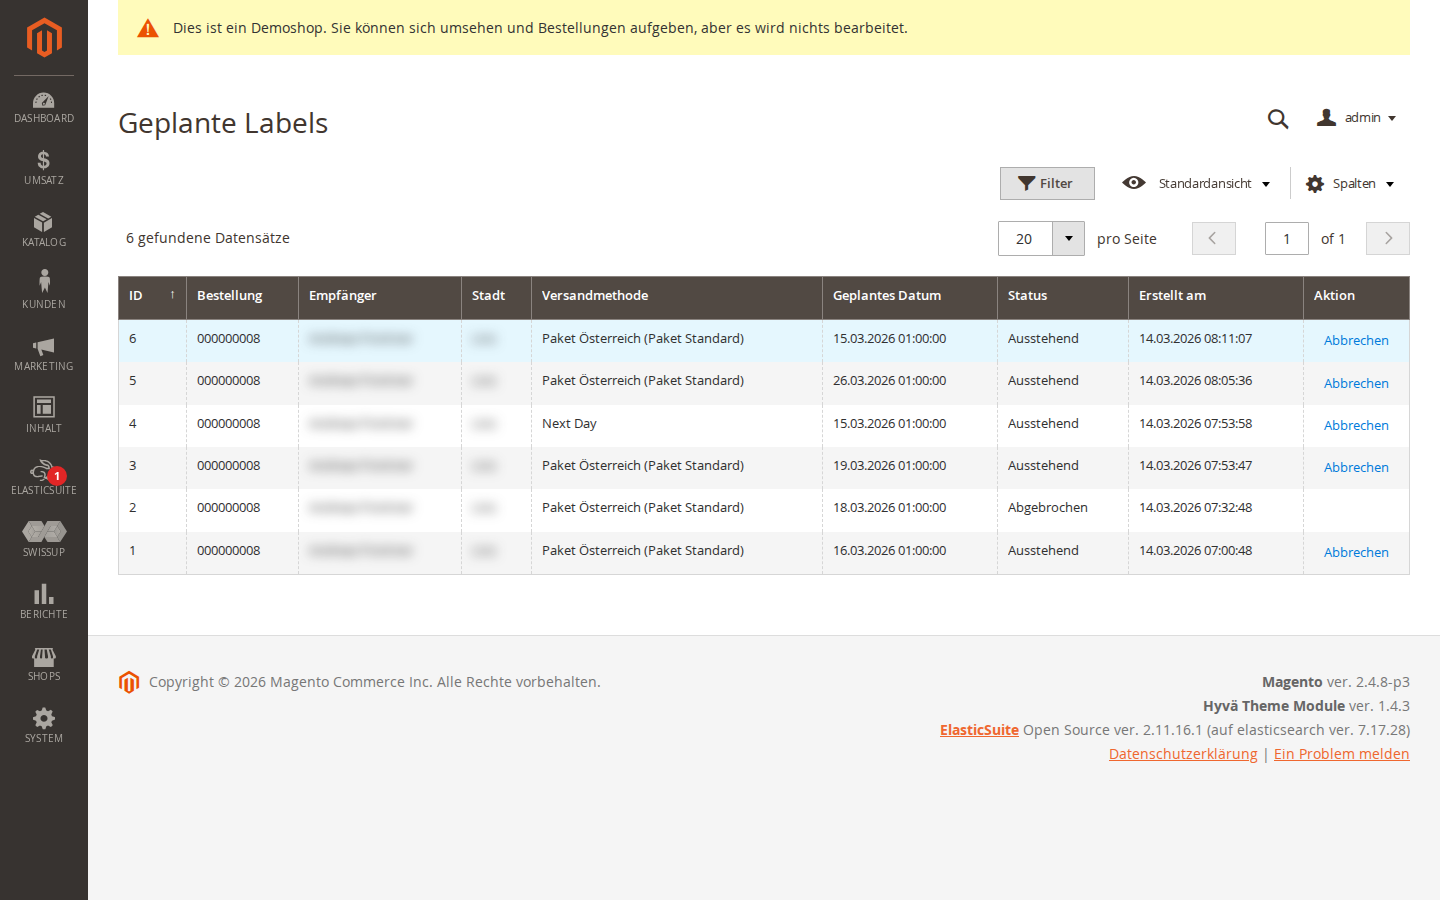
- Order number (with leading zeros)
- Shipping method (full name)
- Recipient (name and address from the shipping address)
- Scheduled shipping date
- Status (Pending / Processing / Completed / Failed / Cancelled)
- Actions: pending labels can be cancelled
Labels are sorted by date in ascending order.
5 Return Labels
5.1 Creating a Return in the Backend
In the order view, you can create a return label for any existing PLC label. Click Create return label next to the relevant label. The return label is generated as a separate PDF that can be downloaded.
Optionally, the return label can be automatically appended to the shipping label PDF (configurable).
5.2 QR-Code Return Labels
The extension supports paperless return labels with a QR code and Code128 barcode. The customer can have the QR code scanned at a post office branch and receive the printed return label there.
The QR-code return label is created via the PLC API function ImportShipmentAndGenerateBarcode.
5.3 Customer Returns in the Frontend
When Enable Customer Returns is active, customers can download a return label from their account under My Orders. The Download return label link appears in the customer's order detail view.
The time window within which a return label can be created is controlled by the configuration (e.g. 30 days after the order date).
6 Additional Services
During label creation, you can select additional Austrian Post services:
- COD (Cash on Delivery): Recipient pays upon delivery
- Fragile: Shipment is marked as fragile
- Insurance: Additional insurance for the shipment value
- Preferred Post Office: Delivery to a specific post office branch
- Preferred Delivery: Preferred delivery date
- and 40+ more additional services
Available services are filtered automatically based on the destination country. Not all services are available for all shipping methods and countries.
7 End of Day
End of Day informs Austrian Post that shipments are ready for pickup. Navigate to Sales > CopeX PLC > End of Day.
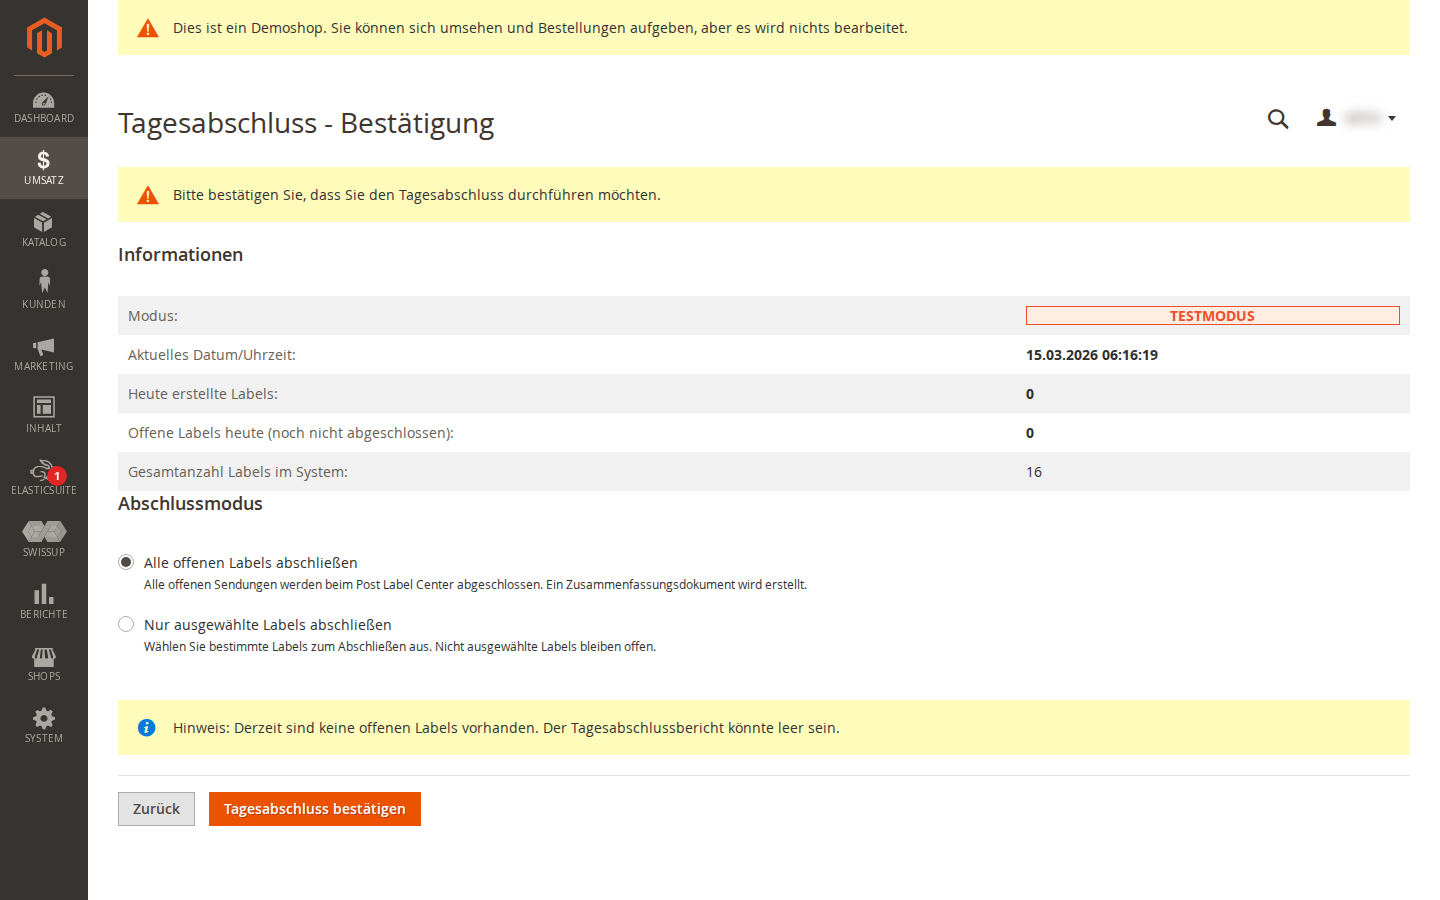
Two modes are available:
- Close all open labels: Closes all open shipments of the day.
- Close selected labels only: Select individual labels by checkbox.
After confirmation, an End-of-Day report is generated and downloaded as a PDF. This report serves as the handover document for the postal carrier.
A confirmation page with current statistics is shown before closing.
8 Import Shipments
Import existing PLC shipments that were created outside of Magento:
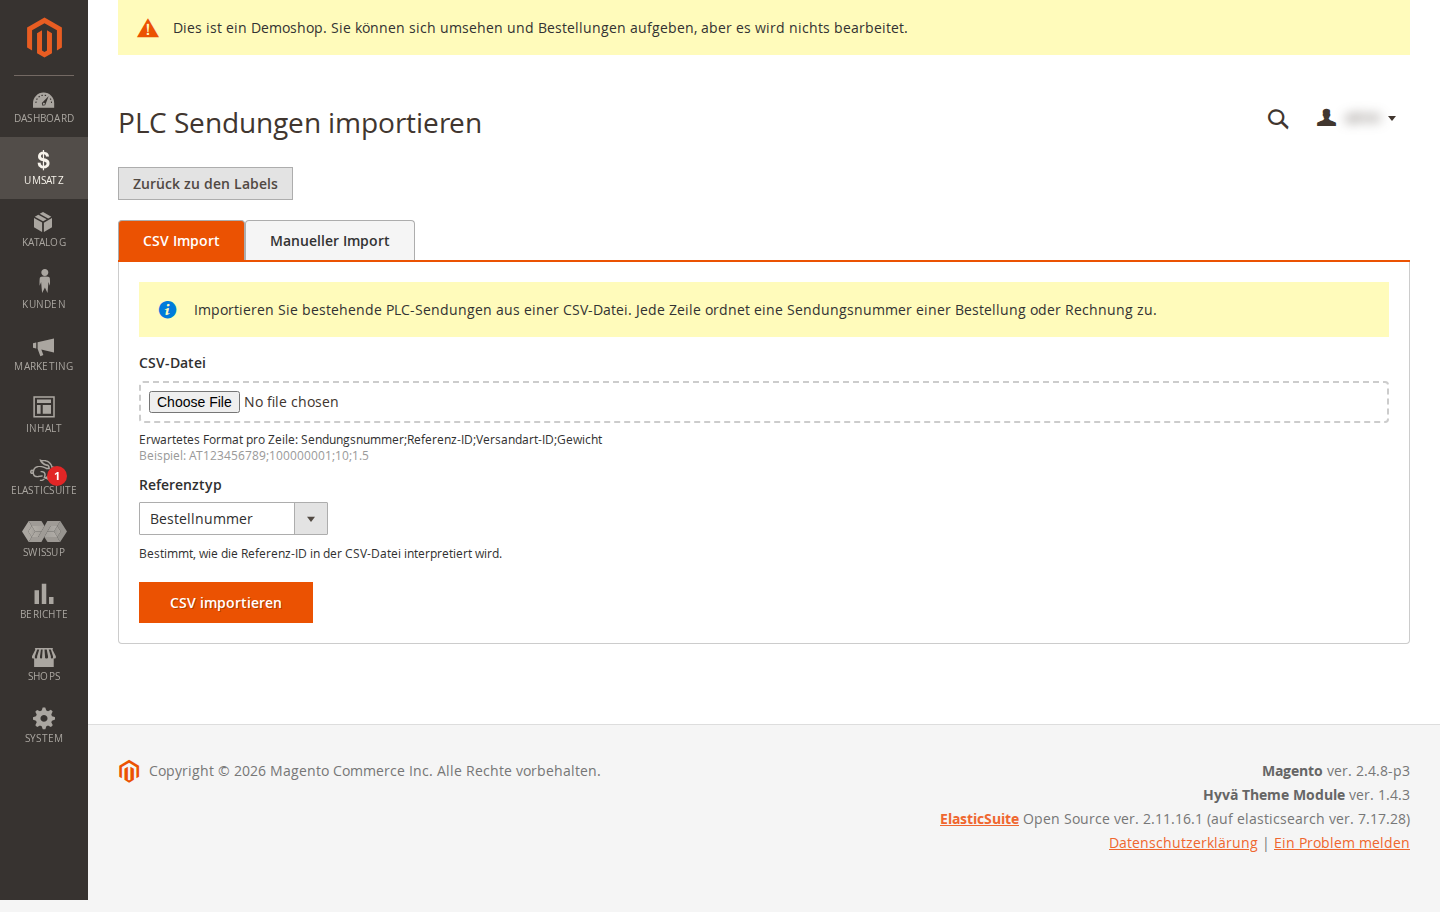
CSV Import
Navigate to Sales > CopeX PLC > Import PLC Shipments and upload a CSV file.
CSV format (semicolon as delimiter):
tracking_number;reference_id;delivery_service_id;weight
AT001234567;100000123;10;2.5
AT007654321;100000124;70;1.0
- Reference ID: Order number (increment ID) or invoice number
- Delivery Service ID: Service ID of the shipping method (see table in section 2.7)
Manual Import
In the same area, you can manually enter a single shipment with tracking number, reference, and shipping method.
9 Customs Declarations
When customs settings are enabled (see section 2.8), customs data is collected automatically for international shipments that require customs documents.
Automatic Data Collection
When creating a label for a customs-required country, the following data is collected automatically from the order line items:
| Field | Source |
|---|---|
| Product Name | Product name |
| HS Tariff Code | Configurable product attribute (default: hs_tariff_code) |
| Country of Origin | Configurable product attribute (default: country_of_manufacture) |
| Unit Value | Order line item (line price / quantity) |
| Quantity | Order line item |
| Weight | Product weight |
Fallback Logic
- HS Code: Product attribute > Default HS Tariff Code > Hard block (label creation is blocked)
- Country of Origin: Product attribute > Default Country of Origin
Validation
If a product has no HS code and no default HS code is configured, label creation is blocked with an error message. The message lists all affected products by SKU.
CN23 Document
When "Request CN23 from PLC" is enabled, PLC generates the CN23 customs document automatically together with the shipping label.
Behaviour in Mass Actions
Customs data collection is fully automatic during bulk creation. For each order, the system checks individually whether customs data is required and collects and validates the item data automatically.
10 PostPay Refund
The extension integrates with the PostPay REST API for automatic refunds.
How It Works
- A customer has paid with PostPay.
- The merchant creates a credit memo (online refund) for the order.
- The extension automatically submits a refund request to the PostPay API using the PLC label number.
- On success: an order comment is added and the credit memo is saved.
- On failure: the credit memo is not saved and an error message is displayed.
Configuration
Navigate to Stores > Configuration > Sales > Delivery Methods > PostPay Refund:
- API Key: PostPay API key (OAuth2 username)
- API Secret: PostPay API secret (OAuth2 password)
The extension automatically uses the test or production endpoint based on the Production Mode setting of the PLC module.
11 Error Handling
PLC interface errors are displayed directly. Common errors:
-
Housenumber is not set: The house number could not be extracted from the shipping address. Edit the shipping address manually in the order detail view, entering the street and house number on the first address line. After saving, you can create the PLC label directly in the order.
-
The shipping product cannot be used for the destination country: Austrian Post shipping products are restricted to certain destination countries. Use the correct shipping method for the target country.
-
HS tariff code missing for products: SKU1, SKU2: For shipments to customs-required countries, the HS code is missing on one or more products. Add the HS code to the product or configure a default HS code in the customs settings.
-
Customs data required for country XX: The destination country requires customs data, but the customs configuration is incomplete. Check the EORI number and customs configuration.
-
PostPay Refund failed: The refund request to the PostPay API could not be submitted. Check the API credentials and try again.
File Permissions
The extension needs recursive write permissions on the following directories:
media/plc/
  media/plc/labels/
  media/plc/endofday/
These directories are created automatically during installation.
License
Proprietary, CopeX GmbH. One license per production Magento instance. Test and development environments do not require an additional license.