ProductAttachments — Product Attachments
Extension for Magento 2
User Manual
CopeX GmbH
Web: https://copex.io
Email: office@copex.io
Table of Contents
| Section | Page |
|---|---|
| 1 Requirements | 2 |
| 2 Configuration | 2 |
| 2.1 General Configuration | 2 |
| 3 Managing Attachments | 3 |
| 3.1 Creating a New Attachment | 3 |
| 3.2 Assigning Products | 4 |
| 4 Managing Icons | 4 |
| 5 Frontend Display | 5 |
| 6 Troubleshooting | 5 |
1 Requirements
- Magento 2.3 or higher (compatible with 2.4)
- PHP 8.1 or higher
- Hyvä Theme or Luma Theme
2 Configuration
The module configuration is located in the Magento 2 backend under Stores > Configuration > CopeX > Product Attachment.
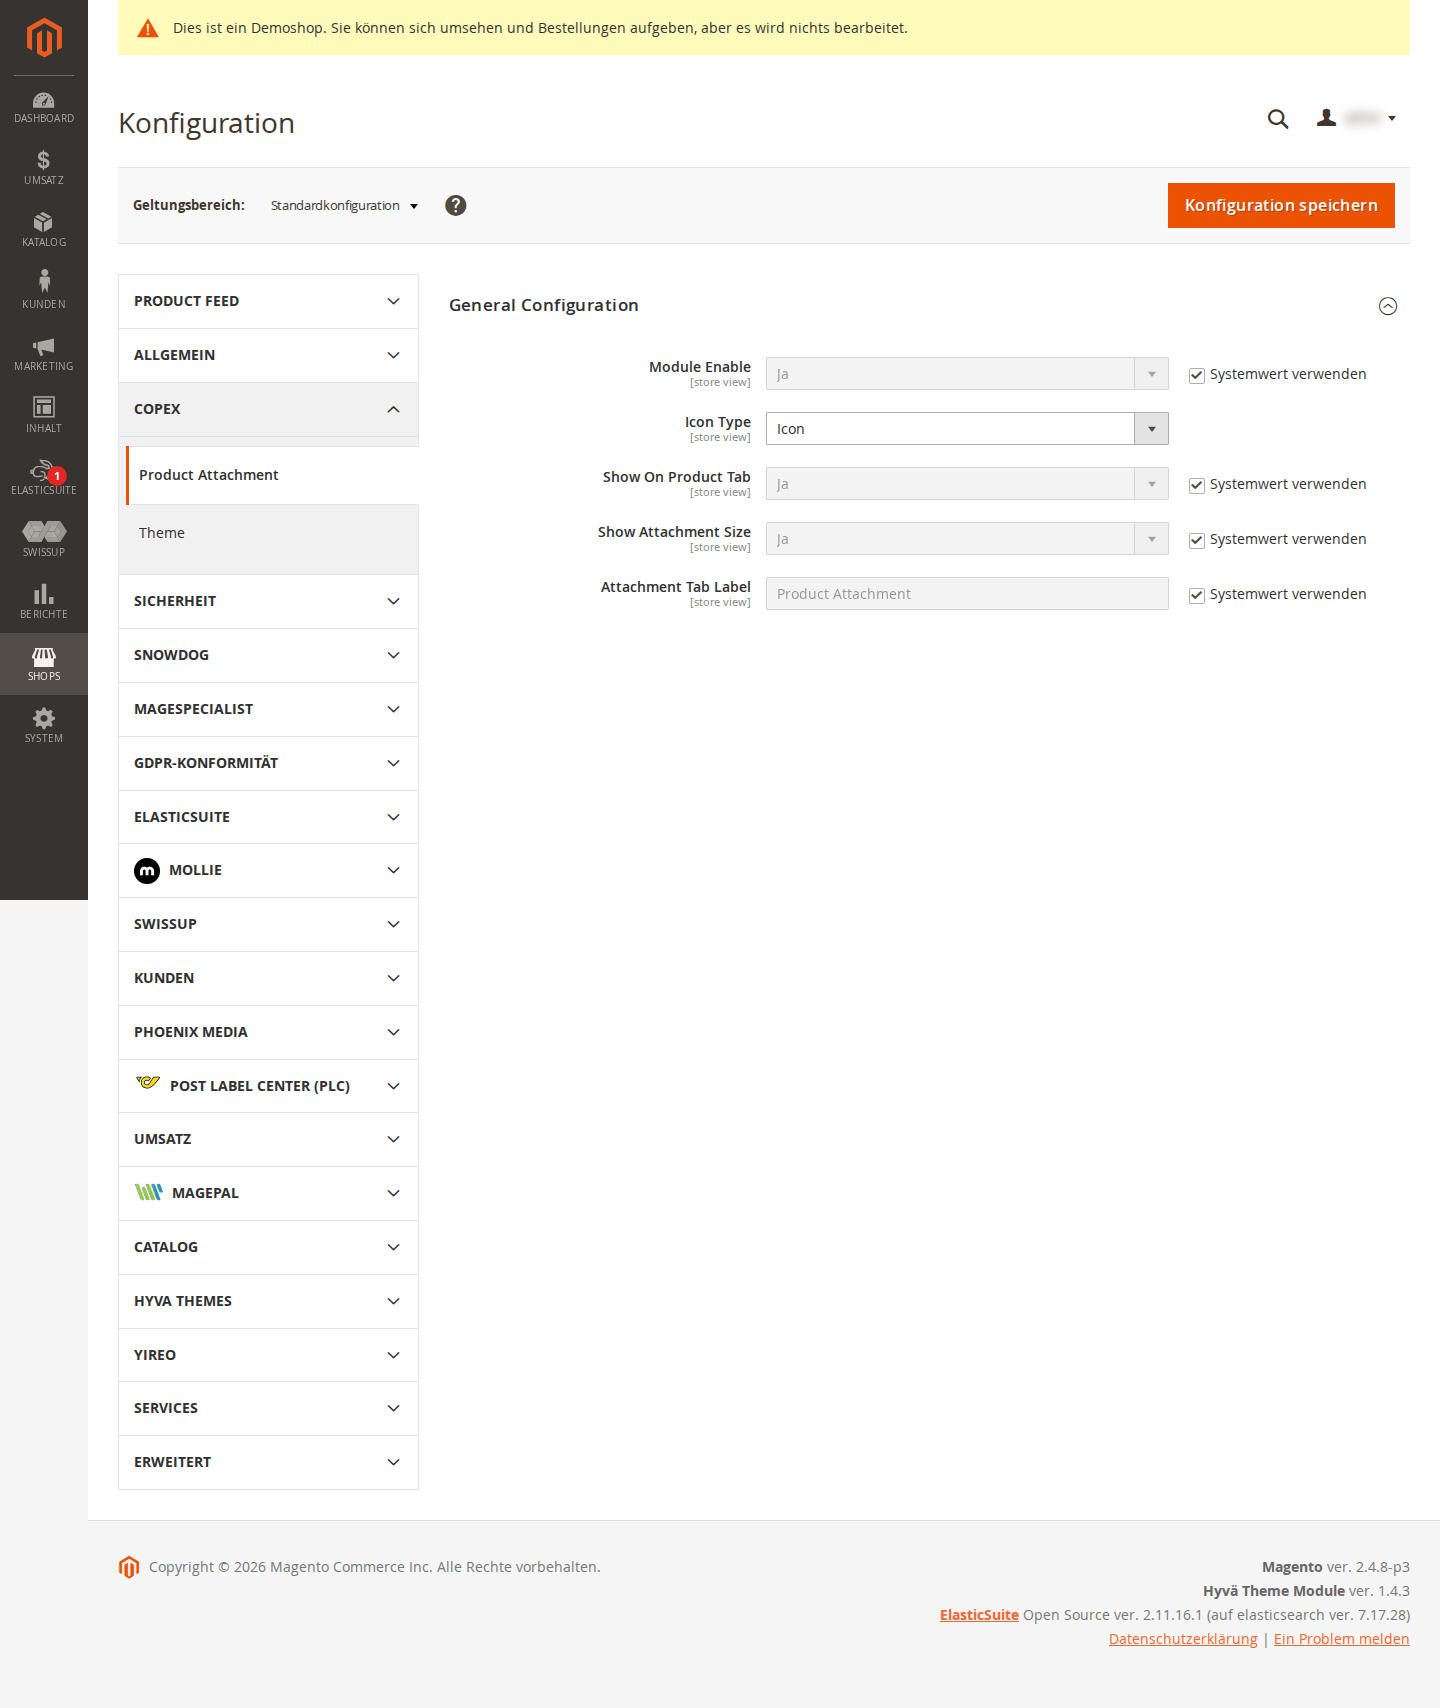
2.1 General Configuration
Navigate to Stores > Configuration > CopeX > Product Attachment > General Configuration.
- Module Enable — Master switch for the module (Yes / No). When disabled, no attachments are displayed on product pages.
- Show On Product Tab — Displays attachments in a dedicated tab on the product detail page (Yes / No). When disabled, attachments are shown below the product description.
- Show Attachment Size — Shows the file size next to the download link (Yes / No).
- Attachment Tab Label — Text label for the attachments tab on the product detail page. Default:
Downloads. - Icon Type — Type of download icon shown next to attachments. Options: default icon or custom icons (from icon management).
3 Managing Attachments
Navigate to Catalog > Product Attachments in the admin area.
The grid shows all created attachments with name, description, status, and actions.
3.1 Creating a New Attachment
Click Add New Attachment. The form consists of two tabs:
Tab: Attachment Information
| Field | Description |
|---|---|
| Name | Display name of the attachment (visible on the frontend) |
| Description | Optional description of the attachment |
| Upload File | File upload field. Allowed file types: PDF, DOC, DOCX, XLS, XLSX, ZIP, etc. |
| File URL | Alternatively, an external URL to a file can be specified |
| Customer Group | Which customer groups are allowed to see the attachment (e.g. only "Wholesale" customers) |
| Store | Which stores display the attachment |
| Active | Enable or disable the attachment |
Tab: Select Products
Select the products for which this attachment should be displayed. Any number of products can be assigned using the product selection.
3.2 Assigning Products
An attachment can be assigned to multiple products. Conversely, a product can have multiple attachments. Assignment is done either:
- In the attachment form under the Select Products tab, or
- Directly in the product editor under the Product Attachments section.
4 Managing Icons
Navigate to Catalog > Product Attachments > Manage Icons.
Custom download icons for different file types can be uploaded here. The icons are displayed next to attachments on the frontend.
Click Add New Icon to upload a new file type icon. Specify the file type (e.g. pdf, doc) and the icon image.
5 Frontend Display
On the product detail page, a Downloads tab (or section, depending on configuration) appears with the list of all assigned attachments. Customers can download files directly or open the linked URL.
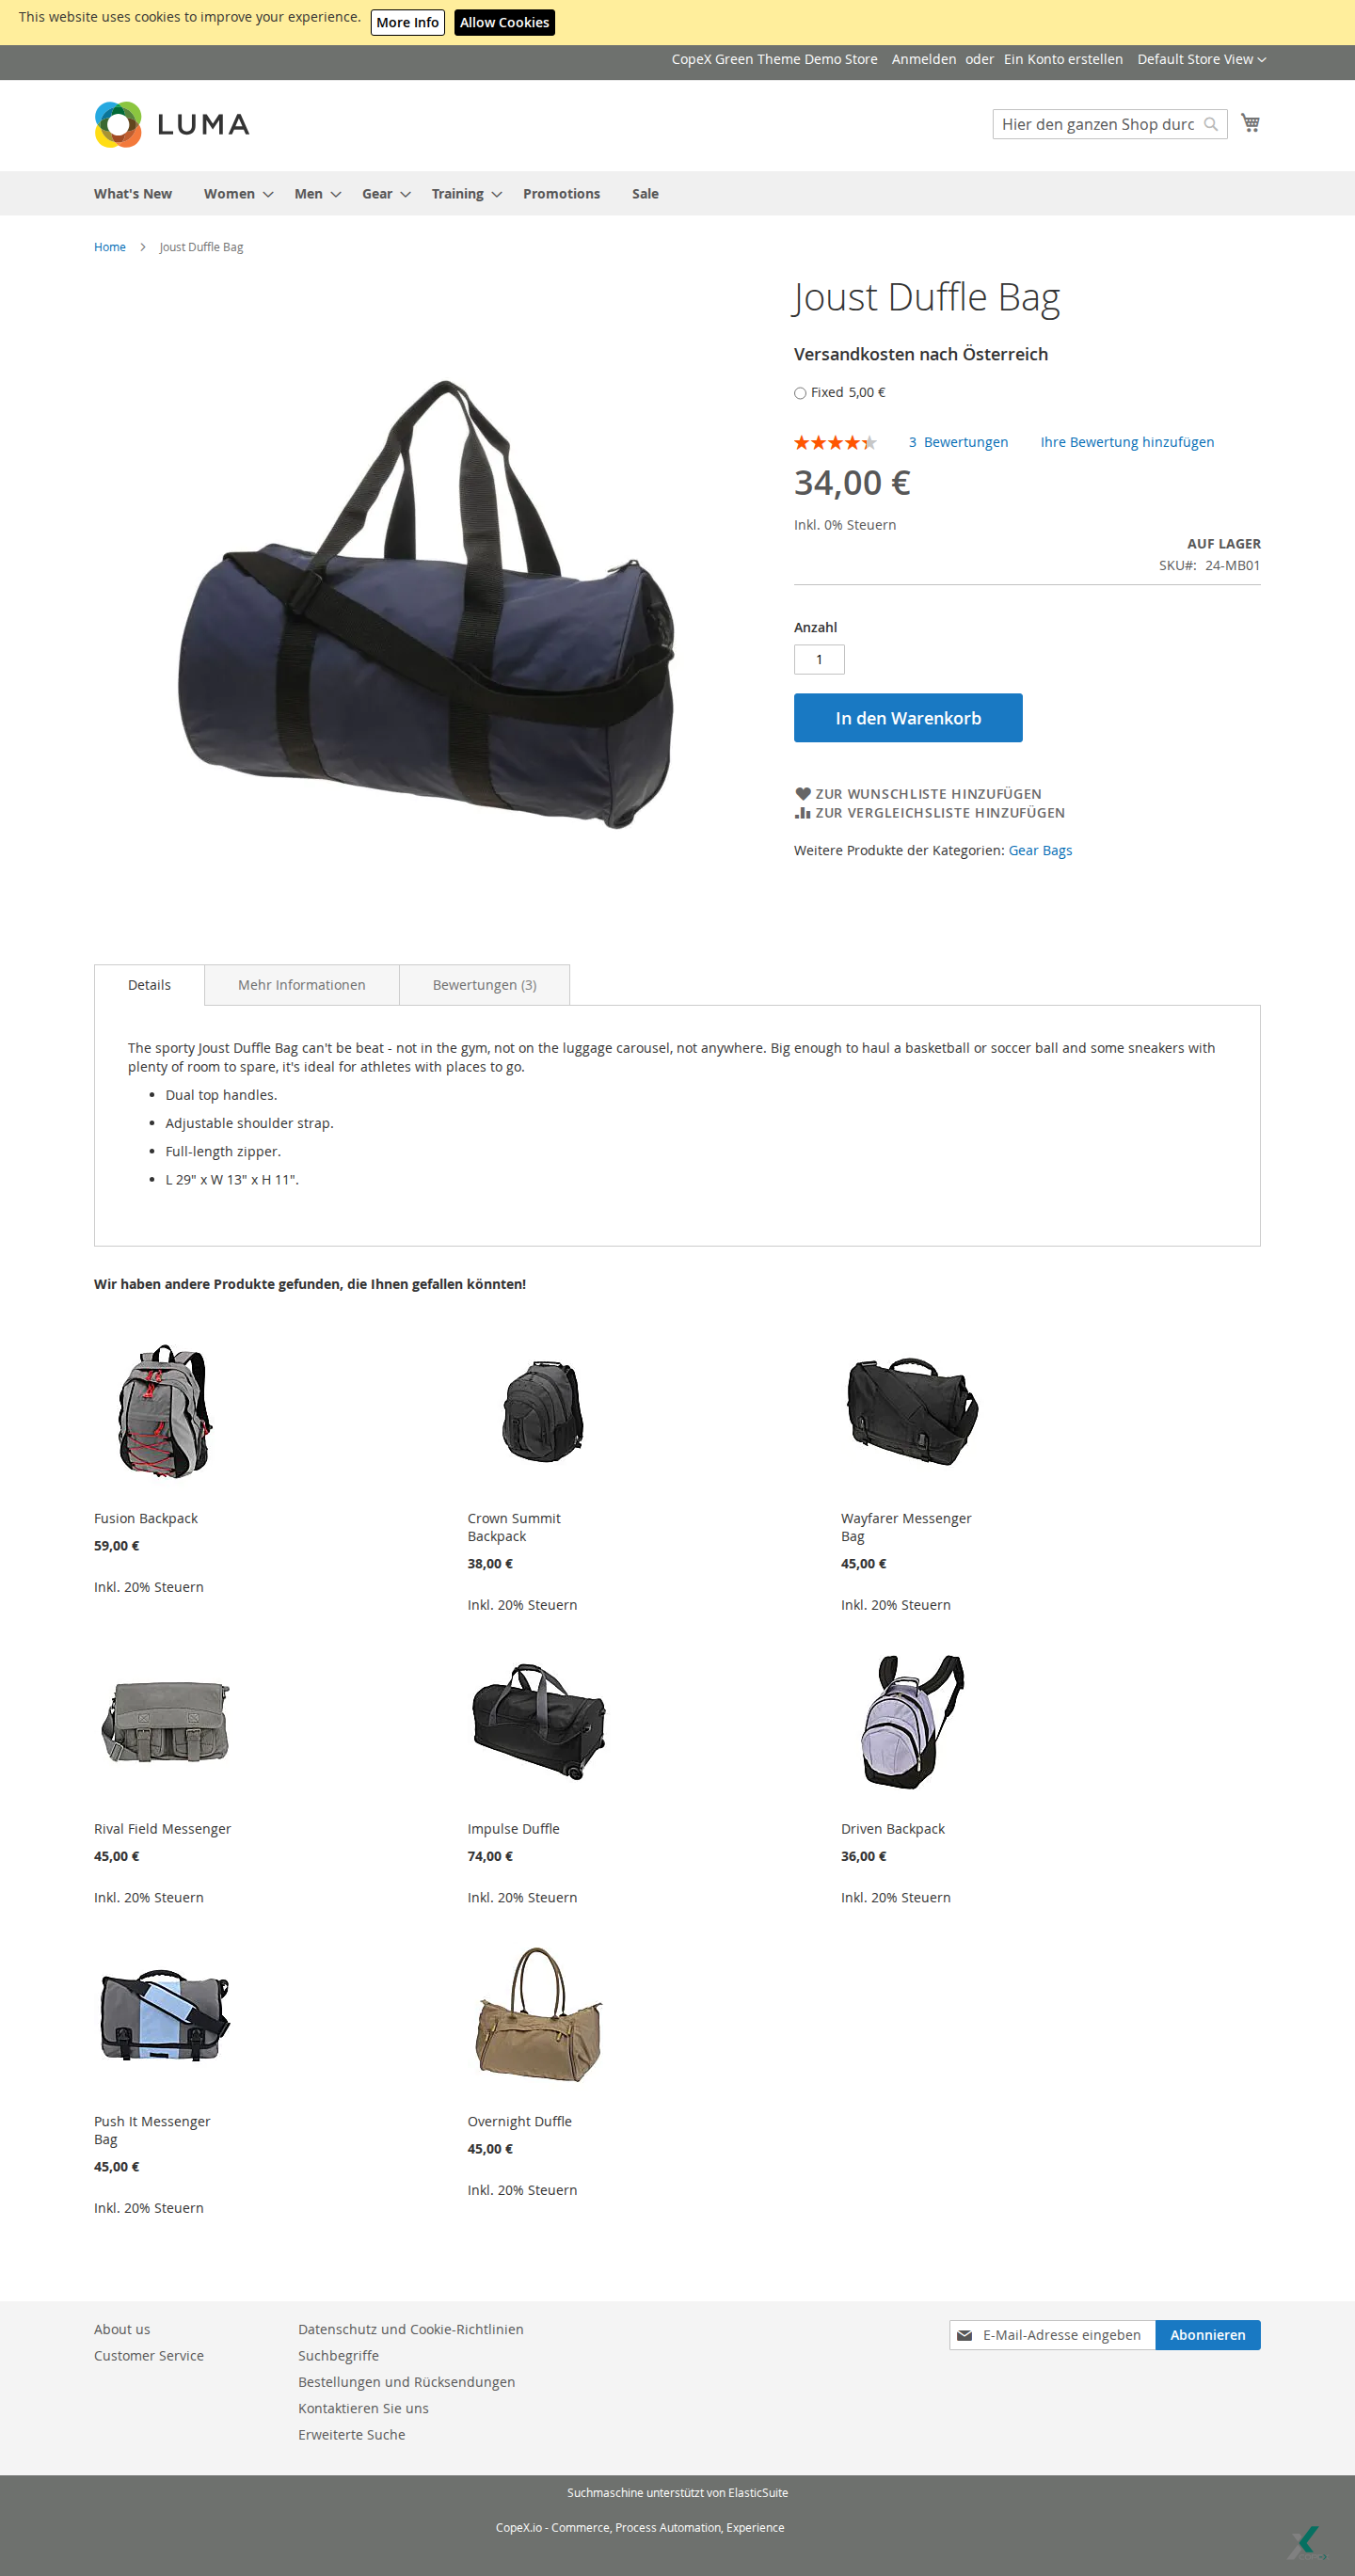
On the frontend, visitors see the attachments section directly on the product detail page. Depending on the settings, it appears as a dedicated tab or as a content block below the product information. Each row contains the attachment name, an optional description, the file size if configured, and the download icon. If no active attachments are assigned to a product for the current store and customer group, the section remains empty or is not shown.
The display takes into account: - The customer group of the logged-in customer (attachments with group restrictions are only shown for the matching group) - The current store scope - The enabled status of the attachment
Guest customers (not logged in) only see attachments without customer group restrictions.
6 Troubleshooting
-
Attachments are not displayed — Check that the module is enabled and that attachments are correctly assigned to the product. Make sure the visitor's customer group is authorized.
-
File upload fails — The upload directory requires write permissions. Check the permissions on
pub/media/productattach/. Disallowed file types are rejected. -
Icon is not displayed — Check that the configured icon type matches the uploaded icon. Clear the Magento cache after uploading new icons.
File Permissions
The module requires write permissions on:
pub/media/productattach/
This directory is created automatically when the first file is uploaded.
License
Proprietary — CopeX GmbH. One license per production Magento instance. Test and development environments do not require an additional license.